(!) This functionality is available through API only by request.
Custom Fields allow you to capture additional information on invoices, purchase orders (POs), vouchers, and expense claims. They can be used for notes, classifications, priorities, payment tracking, or any other business-specific information that is not available in the standard Ocerra fields.
Overview
To access Custom Fields: Settings → Custom Fields
From this page, you can:
- Create custom fields
- Control where fields are displayed
- Choose who can edit them
- Display fields as columns in lists
- Show fields on Ocerra Purchase Orders
- Set fields as required
- Configure whether fields apply to invoices, POs, vouchers, or expenses
Custom Field Settings
| Setting | Description |
|---|---|
| Show | Displays the custom field on invoices, POs, expense screens. |
| Column | Adds the custom field as a column in list views (Invoices, POs, Expenses, etc.). |
| Label | The name displayed to users. |
| Type | Select the field type: Text or Select (dropdown list). |
| Required | Makes the field mandatory before the document can be completed or approved. |
| Show on PDF | Displays the field on the generated Ocerra Purchase Order PDF. This setting only applies to Ocerra POs. |
| Enable For | Controls where the custom field is available. |
| Title | Internal description of the field for administrators. Not shown to end users. |
| Can Appr. Edit | Allows approvers to edit the field during approval. |
| Footer | Places the field in the footer section instead of the document notes/header section. |
Enable For Options
The Enable For setting determines where the custom field will be available.
Option | Description |
All | Available on Invoices/vouchers, Purchase Orders, and Expense Claims. |
PO | Available only on Purchase Orders. |
Voucher | Available only on vouchers/invoices. |
Expense Claim | Available only on expense claims. |
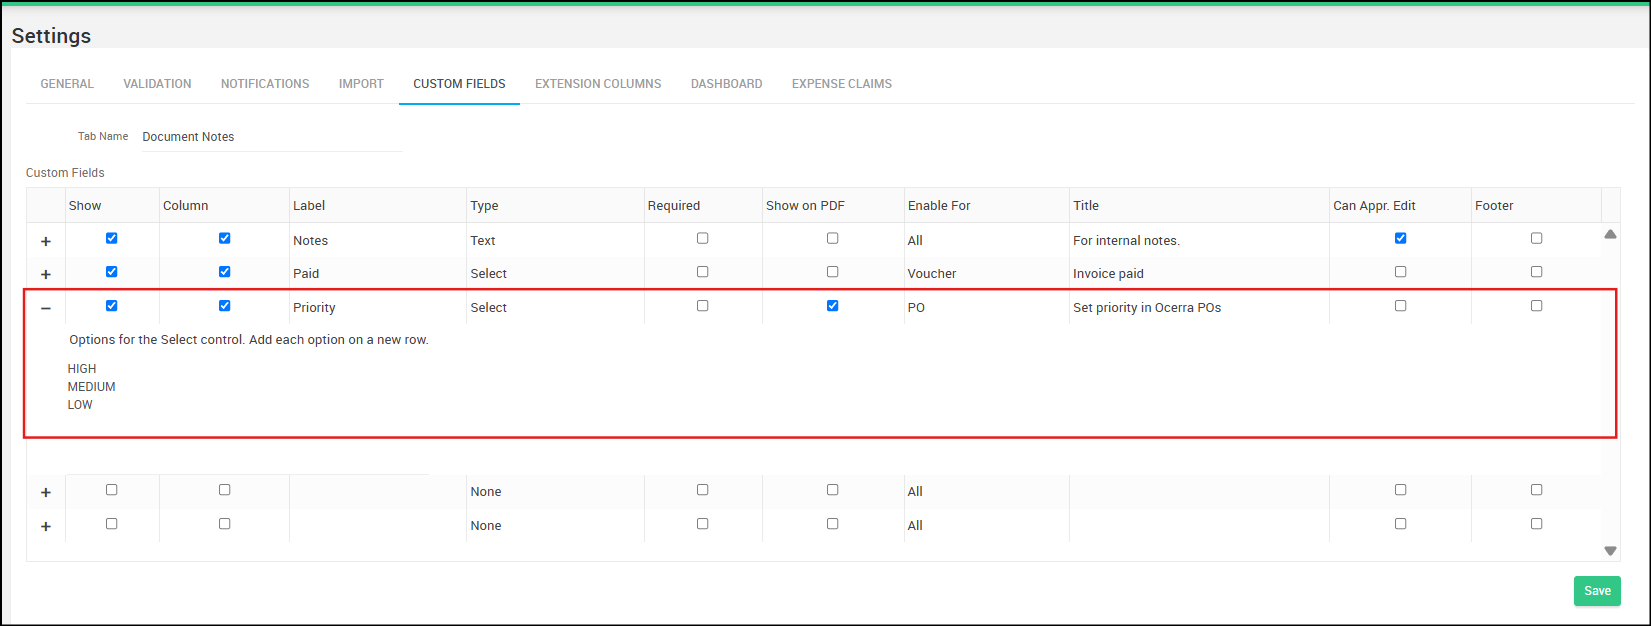
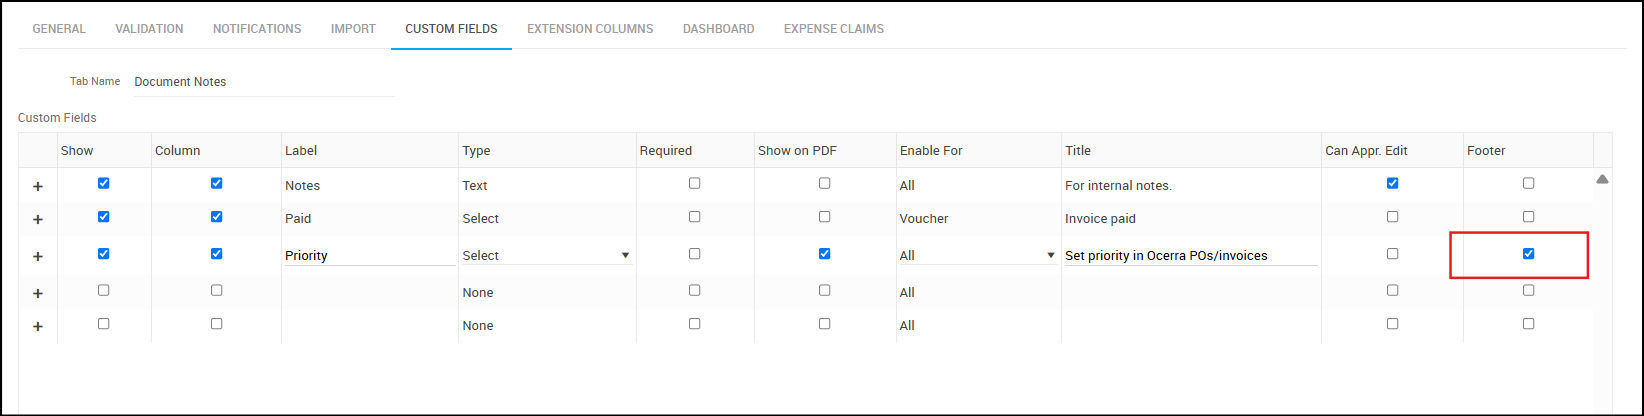
Example Set-up
A custom field called Priority may only be required for Purchase Orders.
In this case:
- Label = Priority
- Type = Select
- Enable For = POs
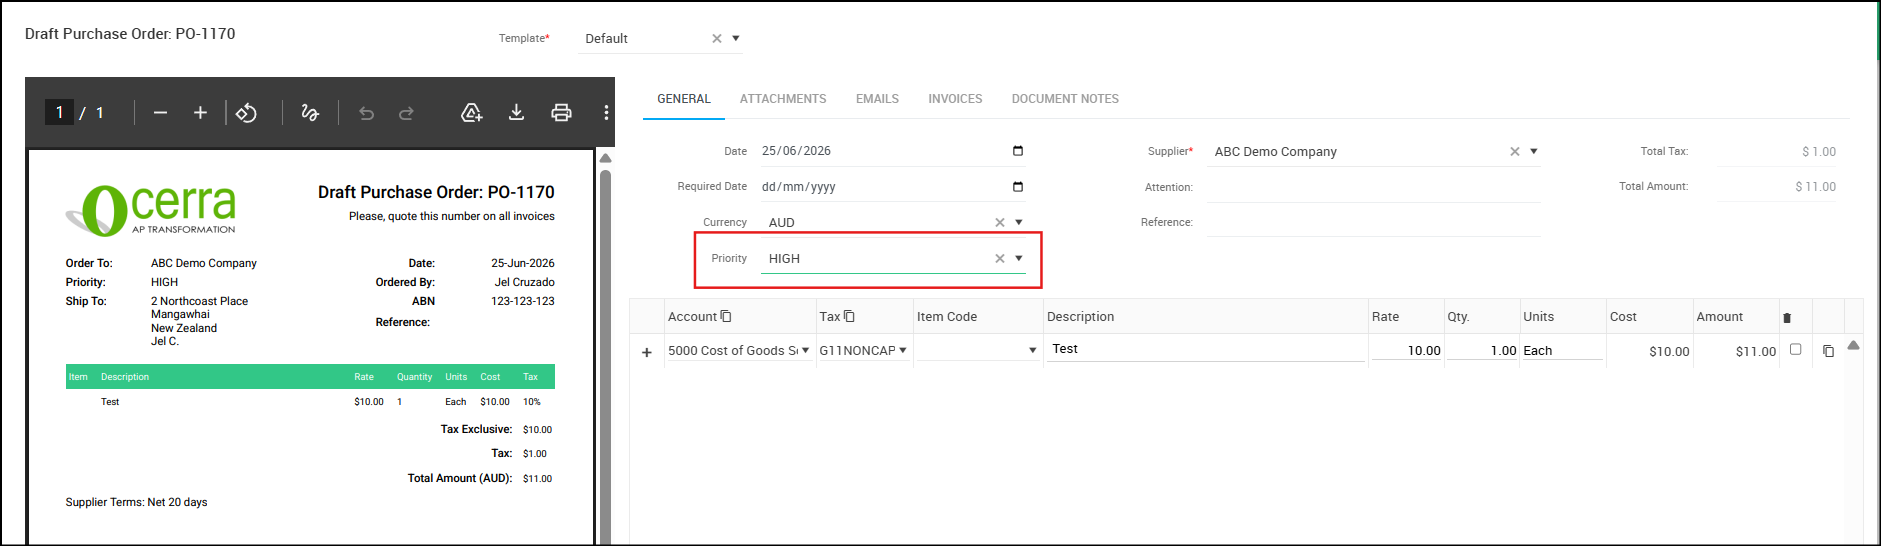
The field will appear on Purchase Orders and not on invoices or expenses.
This example setup will appear like this on the Purchase Order page. Since it is enabled to be shown on the PDF, it will also be reflected on the Purchase Order document in the left-side view.
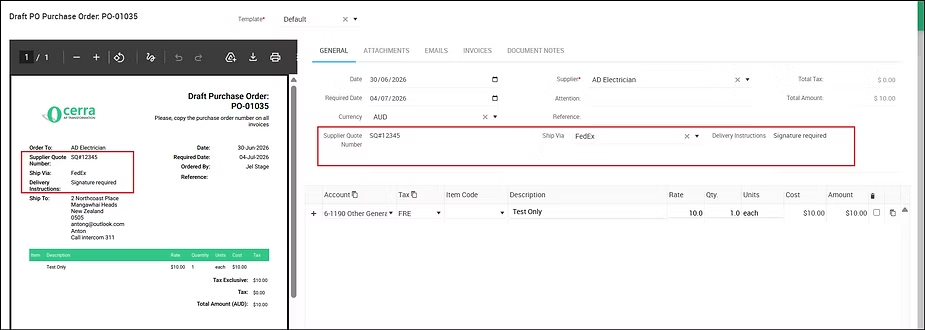
(!) Please note:
- You can now configure up to three custom fields for a Purchase Order (PO). Once configured, users can enter additional information into these fields when creating or editing a PO e.g ship via, delivery instructions and supplier quote number
- Custom fields are designed for user-generated input. It is not captured by AI, and thus, it cannot be trained to remember this information per invoice or vendor.
- If you would like to export custom fields information to your ERP system, please contact support.
- Custom fields can be at either the header or footer level.
Custom Fields: Header vs. Footer
You can decide whether to put Custom Fields in the Document Notes (header level):
Purchase Order view:
Invoices view (if enabled to voucher/invoices):
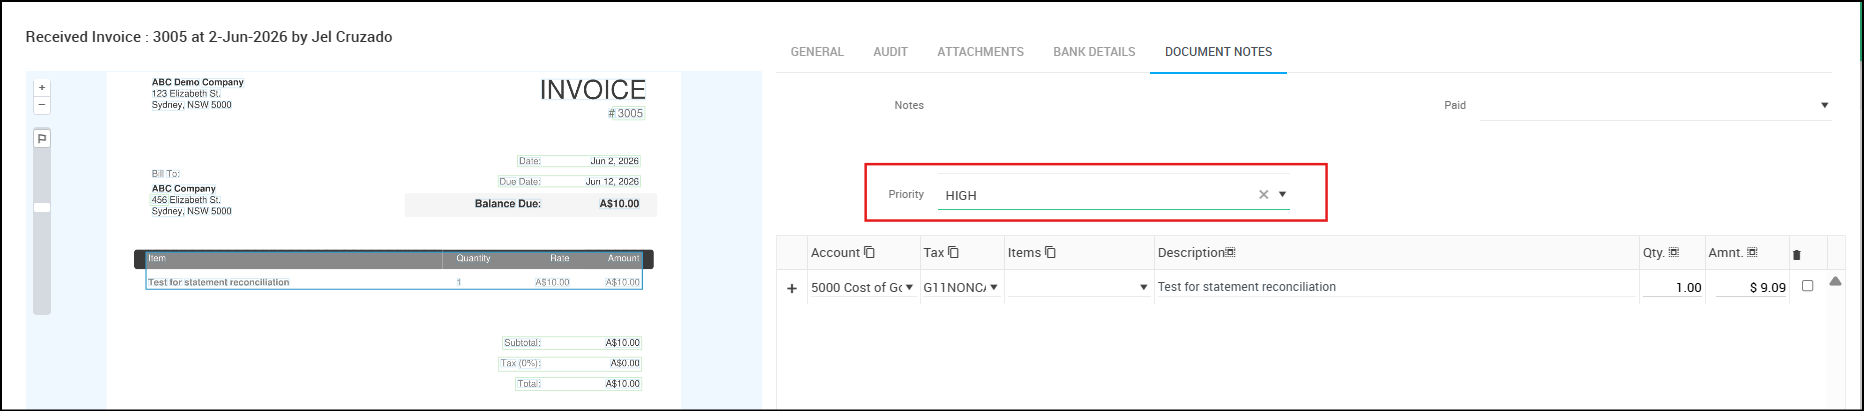
Or at the footer level — if you tick the Footer box, this applies only to invoices. Purchase Orders (POs) are always displayed at the header level.

Tip: Custom fields for customers can also be added directly to the column list in invoices list, allowing you to view this information alongside other columns.
Read next: How to setup invoice priority levels in the custom fields.