This article explains how approved expense claims are exported from Ocerra to your connected accounting system (e.g. Xero, AccuntRight, or Acumatica).
Exporting expense claims in your accounting system works the same way as exporting invoices. The process is familiar, consistent, and follows your existing export workflow.
Note: Only users with the Admin or Accountant role can export expense claims. This permission level is identical to invoice exporting.
1. Navigate to the Export Folder
Go to the Export folder in Ocerra, then switch to the Expenses Export tab. This tab displays all expense claims that are ready for export.
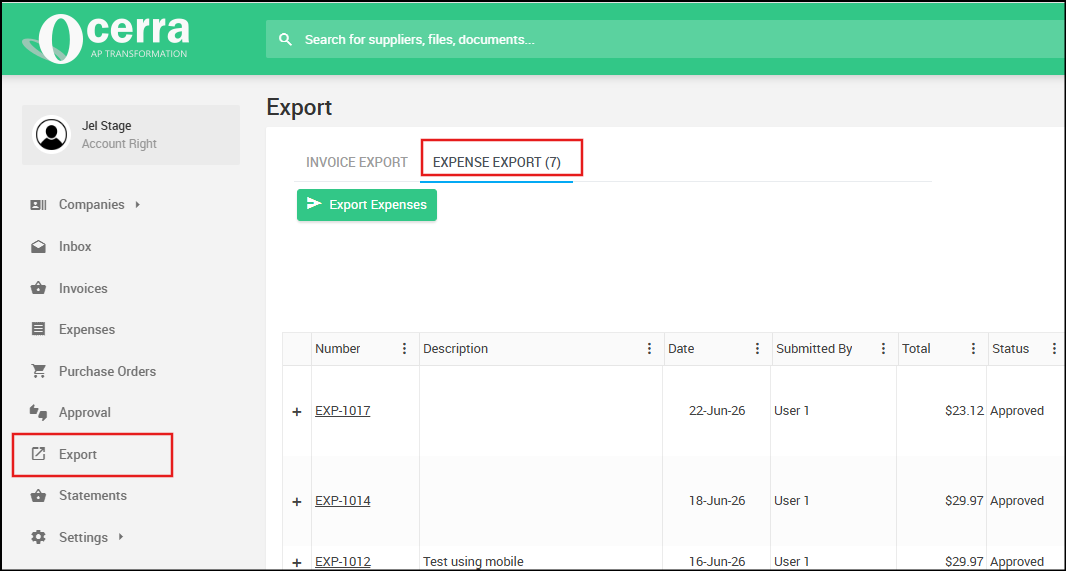
2. Review the Default Filters
By default, this tab shows:
Status: Approved
Exported: No
This means you will only see expense claims that are approved and not yet exported.
3. Select Expense Claims to Export
You can:
Bulk‑select multiple expense claims
Or select them individually
Once selected, you are ready to export.
4. Export the Expense Claims
Click the Export Expense button to send the selected claims to your accounting system.
How Expense Claims Appear in Your Accounting System
Below is a general outline of how exported expense claims appear once they reach your accounting platform.
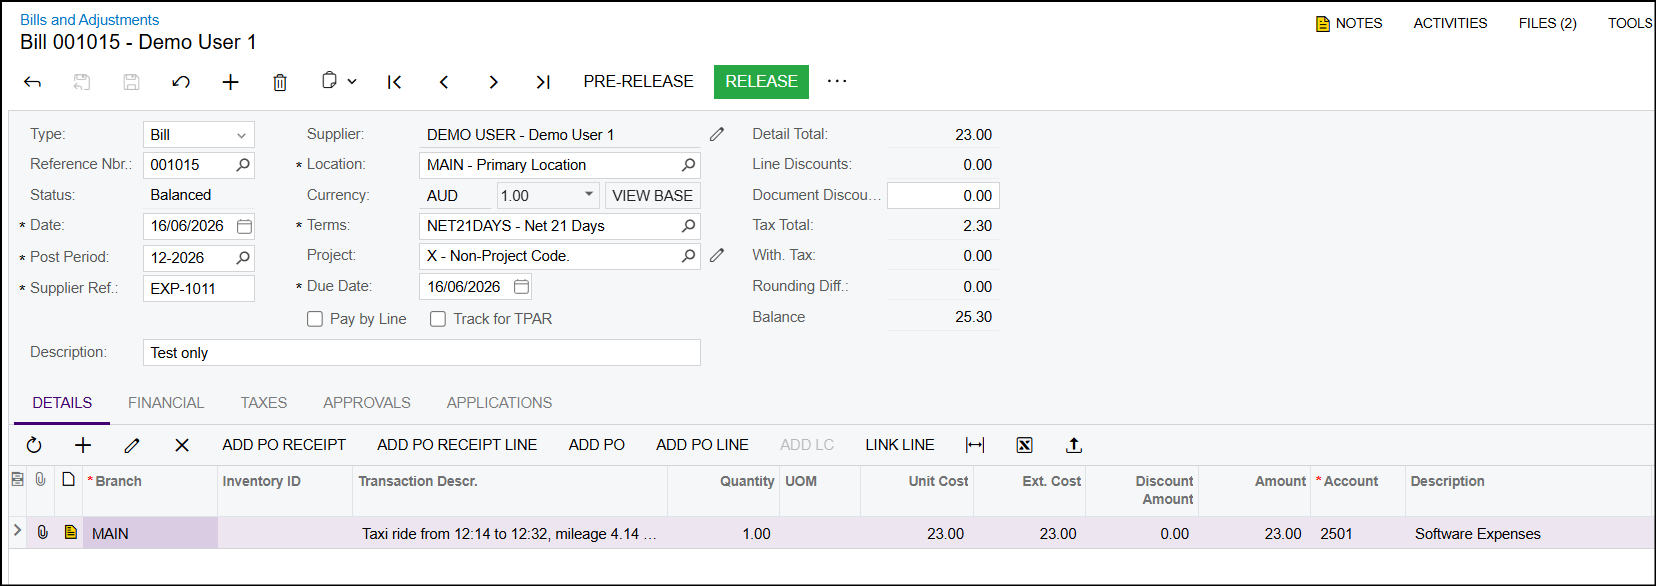
Acumatica
When an expense claim is exported from Ocerra, it is automatically created as a Bill in Acumatica. This process mirrors how invoices are exported — ensuring consistency across your financial workflows.
Expense claims appear as Bills under the supplier created for the employee.
Line items reflect the extracted details from Ocerra.
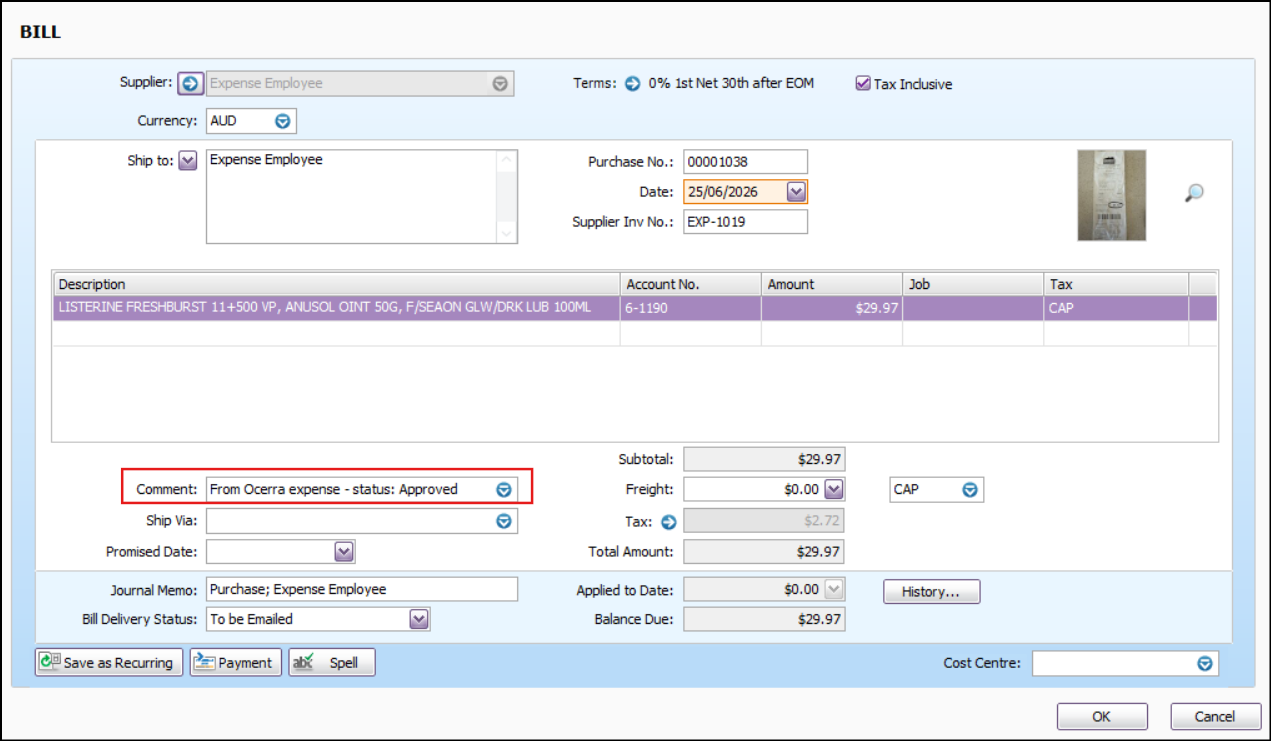
AccountRight
Expenses appear as Bills in the Purchases Register, with EXP-#### as the supplier number.
Each line item corresponds to the extracted expense lines.
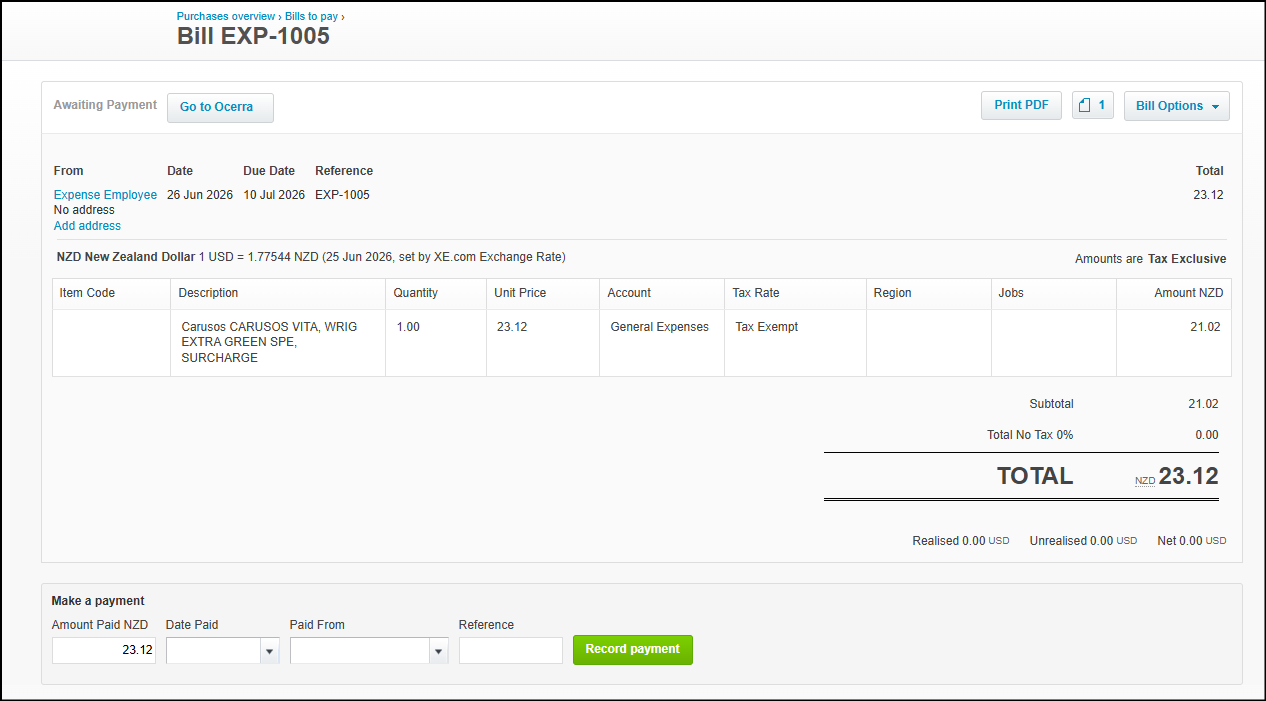
Xero
Expense claims appear as bill awaiting payment tab under the employee’s supplier record.
All extracted lines are included with tax and totals.