Ocerra Expenses allows you to submit business expenses that you have personally paid and need to be reimbursed for by your organisation.
Before you can submit expense claims, your organisation must provide you with access to Ocerra and assign you the Expense User role. If you cannot see the Expenses menu after logging in, contact your system administrator.
Create a New Expense Claim
- Log in to Ocerra https://app.ocerra.com/
- Select Expenses from the menu.
- Click New Expense Claim.
Upload Your Receipts
Upload one or more receipts or invoices that relate to your expense claim.
Desktop
- Drag and drop files into the upload area, or
- Click to browse and select files from your computer.

Mobile
- Take a photo of a receipt
- Select an image from your photo library
- Choose a file from your device
- Upload from Google Drive
You can upload multiple receipts as part of a single expense claim.
Automatic Data Extraction
Once your files are uploaded, Ocerra automatically extracts the details from each document and summarises them into line items.
- If you upload one document, you'll see one line.
- If you upload two documents, you'll see two lines, and so on.
Each line includes information such as the date, description and amount extracted from the receipt or invoice.
Review the extracted information carefully before submitting your expense claim.
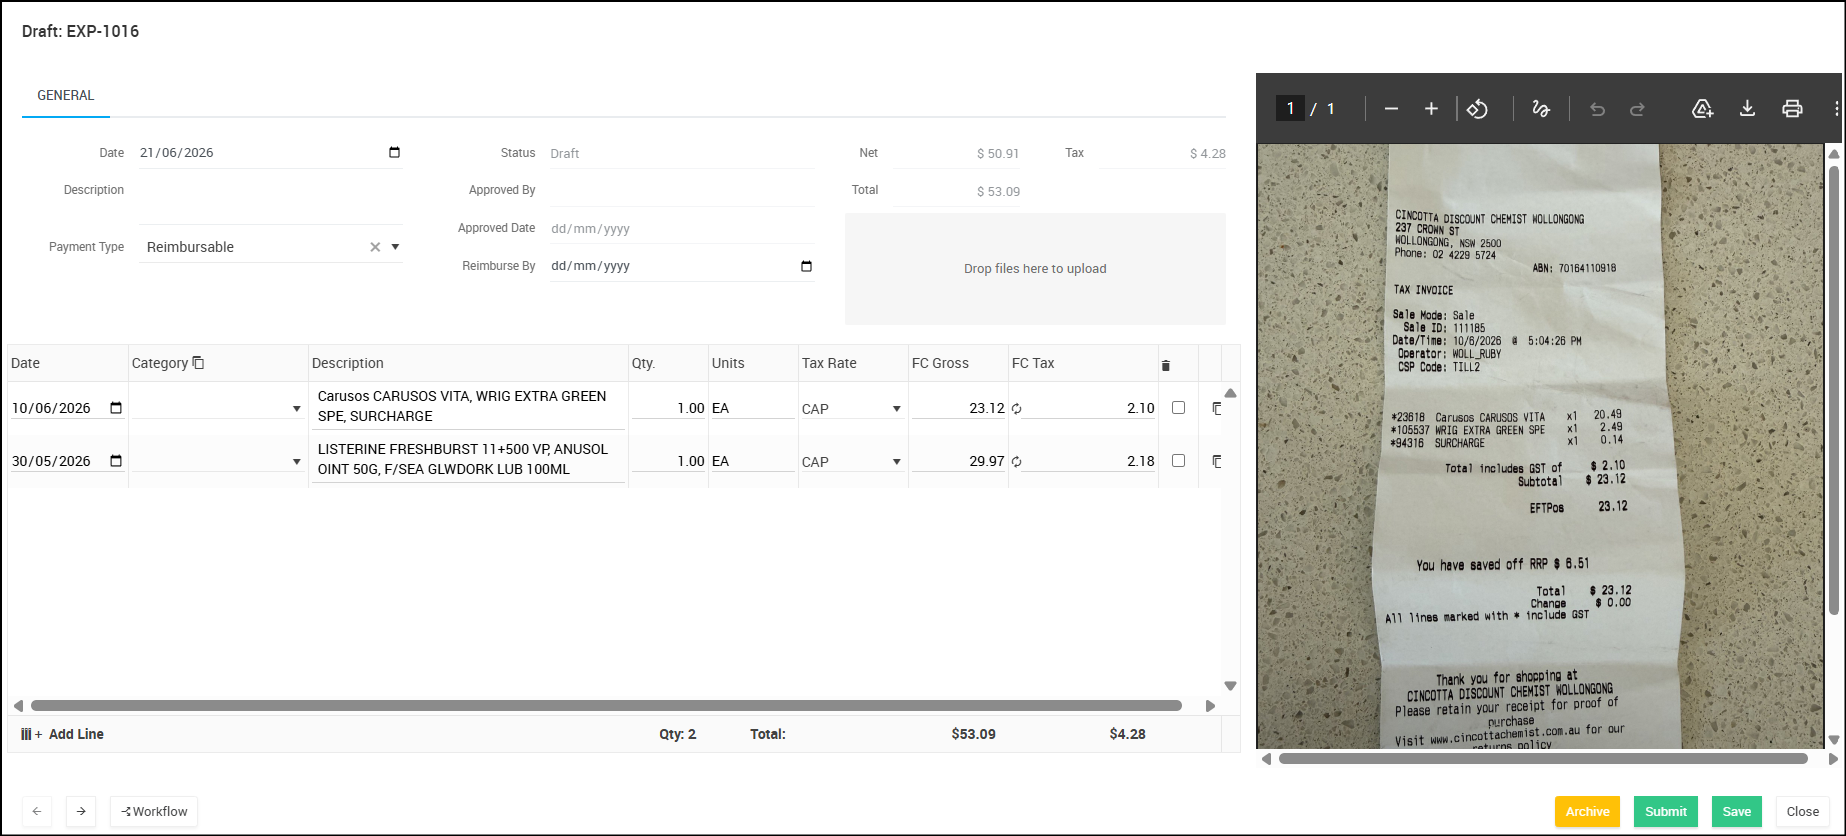
Review Expense Claim
After your documents have been uploaded and Ocerra has extracted the information, review the claim before submitting it for approval.
You can update any extracted information if required, including:
- Description
- Date
- Amount
- Other claim details
Before submitting, ensure the extracted information matches the receipt or invoice displayed in the document preview.
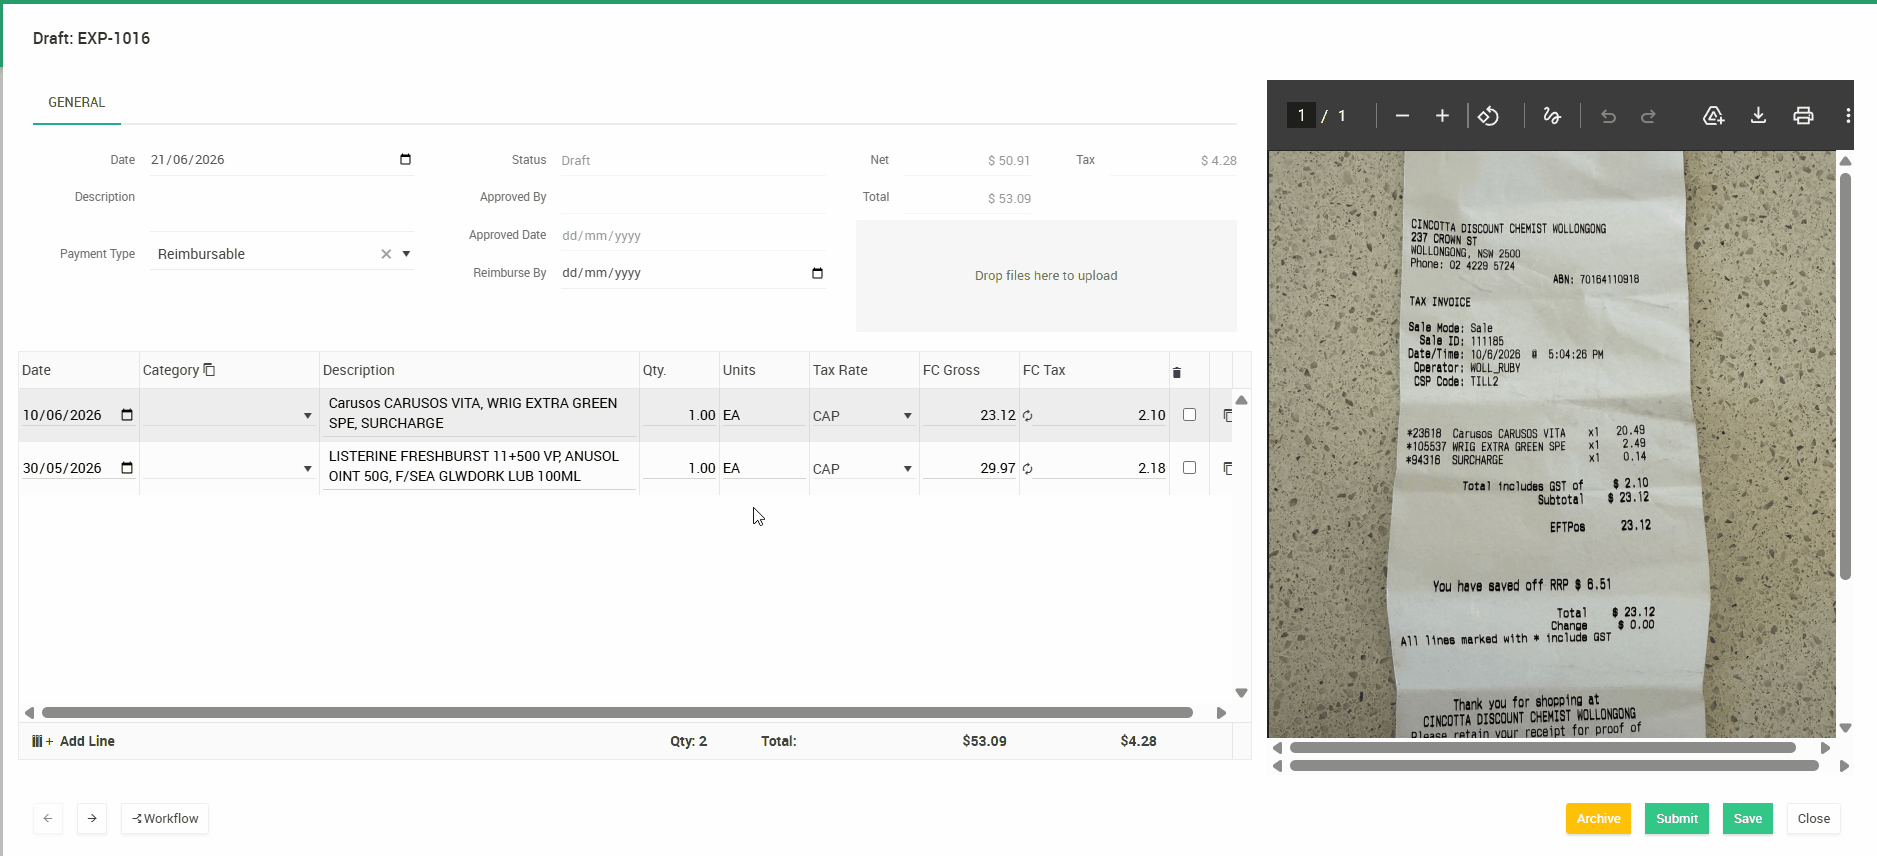
Reviewing Multiple Receipts
If your claim contains multiple receipts:
- Click on a line within the expense claim.
- Ocerra will display the corresponding receipt in the document preview.
- Review the extracted information against the receipt.
- Repeat for each line in the claim.
This helps ensure that each expense line is linked to the correct supporting document.
Submit the Expense Claim
Once you have confirmed that all information is correct:
- Click Submit or Assign an Approver (depending on your organisation's workflow).
- Your expense claim will be sent to the next stage of your organisation's approval workflow.
You can track the status of your expense claim from the Expenses list.